Monday, November 14, 2011

Grilled Cedar-wrapped Fish


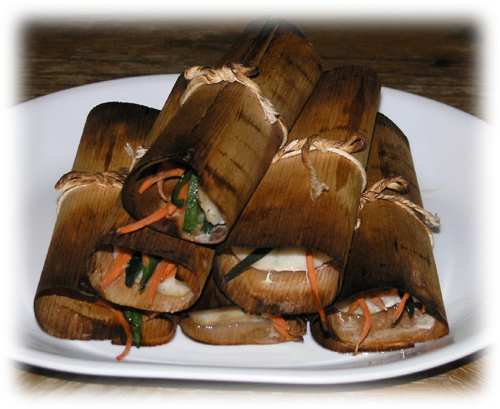
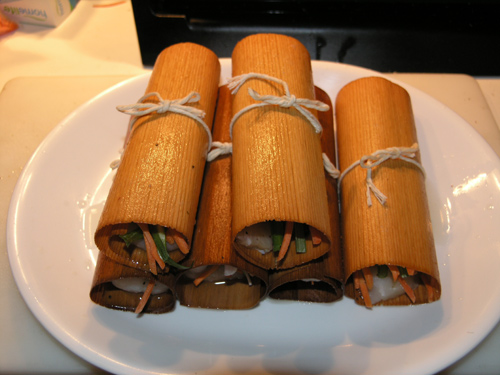
We, my husband and I, have grilled on cedar planks before. Using cedar on the grill imparts such a fabulous flavor into food! But when we saw Cedar Papers, we gave into our curiosity and bought a pack. For 8 papers the cost was $5.99. Making the cedar-wrapped bundles was actually a pleasure. We still have two papers left to try with some steak in the future. The cedar papers, I believe, are really just for a nice presentation on a plate. It was a real thrill to see this nicely wrapped package on a plate and I couldn't wait to untie the string!

Grilled Cedar-wrapped Fish

6 fish fillets (I had flounder)
1-3 poblano peppers (I had very small ones) charred and cut into thin strips
2 green onions - sliced length-wise into thin strips
Julienned carrots
salt & pepper to taste
Sesame oil
Cedar Papers (soaked in water for at least 10 minutes- I used chardonnay - also soak the ties that come with the papers)


Char the poblanos and peel off the skin.
  Slice charred poblanos into thin strips

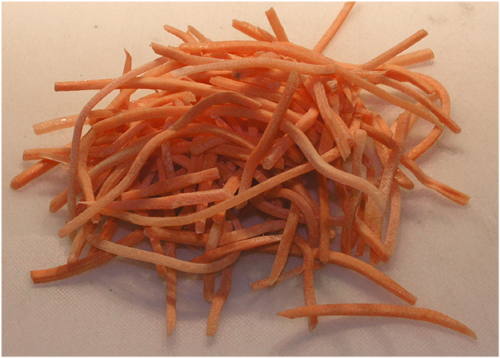
Julienne the carrots (I cheated, I bought them this way)

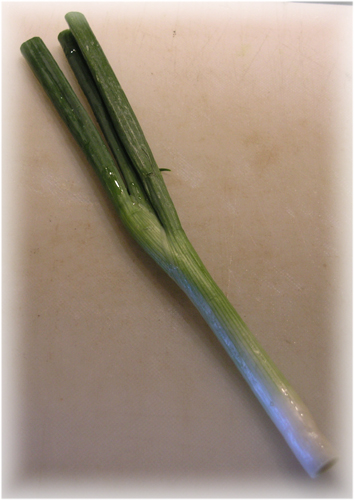
Cut you green onion in half (width-wise, between the bottom and where the top starts to branch off). 

   
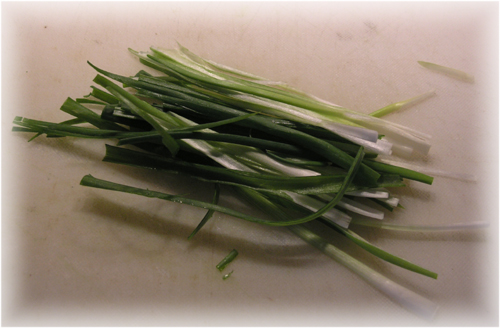
Slice the green onions thinly.

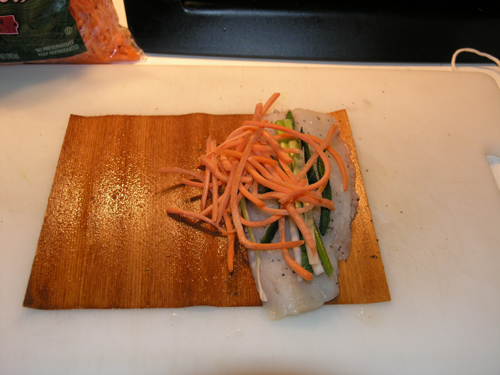
Lay out the soaked cedar paper. 
Rub sesame oil on the cedar (on the food side - adds flavor & food won't stick). 
Place the fish filet on the cedar. 
Add salt and pepper to taste. 
Add a few slices of poblano, green onion and carrots on top of the fish.

    
Roll up the cedar carefully as the cedar is very thin. 
Tie the little bundle with the tie that came with the papers.
Cook on a grill that's fairly hot, about 400 degrees.
Grill for about 5-6 minutes per side.

   
Place a finished cedar-wrapped fish bundle on a plate.
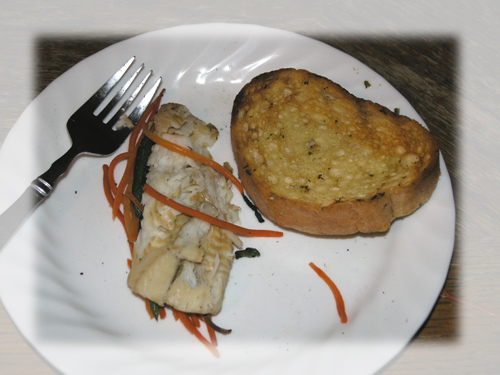
I was so excited to try the fish that I opened up the bundle without taking a picture!
We also grilled some garlic toast to accompany the fish, which went together perfectly.
Everything was delicious - Enjoy!

Saturday, November 12, 2011

Norway Maple Tree

The Norway Maple in my backyard has a long history. My mom and mother-in-law got together to get me and my husband this tree many years ago. It took coupons and some cash and we picked out a tall, lop-sided, discounted Norway Maple. It took many years for it to grow as big as you see below. It was hit by lightening one year and ever since has improved it's look. It got greener leaves, filled in the area where it was lop-sided. The tree was doing so well, and was so pretty! It grew tall enough that in the summer, that it would cast a shadow to the right, exactly where my tomato plants grew, protecting the tomatoes from too much hot sun. My daughter's dogs love the shade the tree gives. That's their favorite spot in the summer, right under the tree. One of them even hoards their toys under there!

Then came the Japanese beetles. They love roses, rose of sharon bushes (to the left of my Norway maple) and yes, maple trees. They didn't really chew on the Norway Maple much, just the bottom leaves. This year was the first year they got to the very top. The poor tree started looking sad and chewed. When the Japanese beetles finally left, we were overjoyed! Then fall arrived.


All of a sudden, almost all the leaves on the tree have big black spots! How much more can this tree take? I did some research and found that the tree has Tar Spot Fungus. How did my tree get this fungus? I don't know, as the spores come from diseased leaves from the year before that are still on the ground around the tree in the spring.


Since my tree didn't look like the above pic last year, I want to know which neighborhood tree decided to drop their leaves in my yard, infecting my beautiful tree. Doing research on the Internet, I found that Tar Spot Fungus isn't usually life-threatening to the tree. It just makes it a little unsightly. The best we can do is clean up ALL the leaves this fall.


And make sure that leaves are not around my tree in the spring. What happens is there are spores in the black spot. The spores get released in the spring, and if they are conveniently near a Norway Maple, the tree will keep getting infected. So, we will work at getting rid of all the leaves this fall. We'll cross our fingers and hope for the best next year. Our beautiful Norway Maple deserves so much better!

Sunday, May 1, 2011

Sweet Delicate Lavender

For over 20 years, we've had roses growing in a garden surrounding our deck. For the past 3 years, we've been overwhelmed with Japanese beetles, where all we seem to be doing is applying Sevin dust constantly to get rid of the little pests. So we decided to transplant our roses to our front island garden. We bought 12 lavender plants at the end of last season for a great price. We planted them and hoped they would last the winter, as they really weren't looking good at the store. Guess what? They did survive! We've now got to get woodchips to fill in to make our lavender garden look pretty.

I love to cook with lavender! I make lavender jelly every year as well as rose petal jelly. They are such delicate flavors to spread on bread or crackers. I even made cream scones with lavender jelly that my husband and I munched on while watching the William & Catherine Royal Wedding, and they were delightful! Of course lavender is an ingredient in one of my favorite herb blends, Herbes de Provence. I make my own blend from my herbs that I've grown. Last year was the first year I couldn't find any marjoram to grow, so I had to buy it along with savory & fennel seeds. Still looking for another plant! My recipe is:

Herbes de Provence
2 tablespoons dried, crushed lavender
2 tablespoons dried rosemary
2 tablespoons dried thyme
2 tablespoons dried oregano
2 tablespoons dried basil
2 tablespoons dried marjoram
2 tablespoons dried, crushed fennel seed
2 tablespoons dried savory

Mix the blend all together and store away in a small jar.

Starting my 2011 Garden - Peppers - jalapenos & cubanelles - Tomatoes

It's been a long time coming this year. But finally, it's almost planting time, here in a suburb of Chicago! The search words that usually make it to this blog is cubanelles or cubanelle peppers. I grew them a couple of years ago, but it really is still the most searched for this site. So, I gave in this year and bought two cubanelle peppers to grow with my jalapenos.

I bought plants this year, as the room that I used for growing seeds in was made into an office space for my husband. And he doesn't like it too warm. Big hmmm there. So I bought my peppers this year at Lowe's. From $3.49 for the mammoth jalapenos to $1.18 for the regular jalapenos. I got 6 mammoth jalapeno, 3 regular jalapeno, 2 cubanelle and 1 New Mexico Big Jim chile pepper. I'm still looking for some poblano plants....  I also bought some Roma Tomato plants. I like romas, because I make a ton of salsa and spaghetti sauce. Salsa is my favorite thing to can every fall! I'm getting ahead of myself! None of these plants are ready to put in the ground yet. I like to wait until the weather is at least 50 degrees at night. Shouldn't be but another week or so. I can't wait!

In the meantime, I always wonder if I am getting different peppers when buying them from the store. The leaves look identical on the jalapeno, cubanelle and the Big Jim pepper, at least at this point in their young lives. You never know untill those peppers start growing, LOL! I do know when I grew peppers from seed last year, my poblano peppers took a lot longer to germinate than my jalapenos. And they do tend to look alike until they start growing in height. While jalapenos are little bushes, the poblano plant grows tall (I've had over 4ft high). It's almost like a little tree. My husband and I are just totally fascinated with the poblano plant. But all peppers are truly interesting to us. The shape, smell and of course the flavor of each one. Fascinating!

Friday, February 11, 2011

Full of Love Valentine's Day Cookies

I make these cookies for Valentine's Day, and my family just loves them! Enjoy!